RTanque getting started
Updated

This is an introduction to RTanque. It covers installation of RTanque and the creation and distribution of a tank. Total time required: ~20min
RTanque is a game for (Ruby) programmers. Players program the brain of a tank and then send their tank+brain into battle against other tanks.
If you are comfortable installing a Ruby gem, run gem install rtanque, and skip to the Making a Tank section.
Some familiarity with the command line and Ruby would be helpful. All the following commands are run on the command line. OSX or Linux will work great. Sorry Windows users, I have not tried this on your OS.
Prerequisites
Before getting started, make sure you have the following installed. Links to installation guides are provided if not.
Git - required to download the RTanque code. Make sure git --version outputs something similar to the following:
$ git --version
git version 1.8.3.4 (Apple Git-47)
Ruby - language we’ll be using. Must use version 1.9 - 2.0 (2.1 is not yet supported). Make sure ruby -v outputs something similar to the following:
$ ruby -v
ruby 2.0.0p353 (2013-11-22 revision 43784) [x86_64-darwin13.0.2]
Bundler - ruby package manager. Should be installed already with ruby, but just in case check the output of bundle -v
$ bundle -v
Bundler version 1.3.5
Install
Clone the RTanque repository, install the dependencies, and play a quick match.
We’ll make a copy of the RTanque repository. This step could also be done by installing the rtanque gem directly, but this way you can easily inspect the code and maybe even make some improvements to it.
$ git clone https://github.com/awilliams/RTanque.git
Cloning into 'RTanque'...
...
Enter into the newly created directory, and install the dependencies.
$ cd RTanque
$ bundle install
Fetching gem metadata from https://rubygems.org/.........
...
If bundle install did not work, you probably need to install some dependencies for Gosu, the graphics library. See this page for more help.
Play a quick match to make sure everything works. After running this command, you should see a new window open with 2 tanks. Control the Keyboard tank with a, s, d, w and the arrow keys.
$ bundle exec bin/rtanque start sample_bots/keyboard.rb sample_bots/seek_and_destroy.rb
Once you’ve won a match or two, continue on…
Making a Tank

Setup
The Keyboard tank is fun, but let’s make a tank that can drive itself.
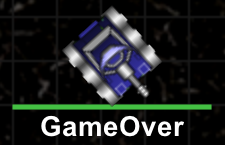
Create a new tank. The RTanque command line interface will make a basic tank for you. Here we’ll name the tank GameOver, but you can name yours whatever you like. Use CamelCaseNaming. Make sure to adjust the following commands for the name you choose.
$ bundle exec bin/rtanque new_bot GameOver
      create  bots/game_over.rb
Open the newly created file for editing using your editor of choice in the bots directory. You should see something like the following:
class GameOver < RTanque::Bot::Brain
  NAME = 'GameOver'
  include RTanque::Bot::BrainHelper

  def tick!
    ## main logic goes here

    # use self.sensors to detect things
    # See http://rubydoc.info/github/awilliams/RTanque/master/RTanque/Bot/Sensors

    # use self.command to control tank
    # See http://rubydoc.info/github/awilliams/RTanque/master/RTanque/Bot/Command

    # self.arena contains the dimensions of the arena
    # See http://rubydoc.info/github/awilliams/RTanque/master/frames/RTanque/Arena
  end
end
Make sure that it is in fact a working tank.
$ bundle exec bin/rtanque start sample_bots/keyboard.rb bots/game_over.rb
Hopefully you saw a new RTanque window open, and your lifeless tank just sitting there.
Time to give your tank some intelligence.
Basics
RTanque::Bot::Brain -
This is where you’ll spend most of your time, as your tank is an instance of this class. RTanque uses a loop to update the state of the game. Every iteration of this loop calls the tick!# method on your Brain instance.
This is your chance to react to any changes in the game since the last tick, by reading from the sensors and giving commands. This method is called many times per second.
There are two primary methods #commands and #sensors to control the tank and get information about your tank, respectively. We’ll go into more detail about these methods below.
RTanque::Heading -
Angles are represented by instances of the this class. For example, to turn the tank, you pass an instance of RTanque::Heading to Command#heading=.
Review the documentation for that class to familiarize yourself with it, as it’s used throughout the project.
Examples:
RTanque::Heading.new(RTanque::Heading::NORTH) is a heading pointing up, and RTanque::Heading.new(RTanque::Heading::EAST) to the right. Headings are always absolute, never relative to the tank or any other object.
RTanque::Point - Locations of objects, such as tanks, are described with instances of this class. The upper-left corner is (0,0).
Movement
Now we have to code a bit of Ruby to get your tank moving.
Have a look at the RTanque::Bot::Command class.
Each tick, you are provided with a new instance of Command via Brain#command.
There are limits to how you can control your tank. There’s a speed limit, rotation limit, etc. Don’t worry too much about that now, because if you provide a speed over the limit, for example, it will automatically be corrected to the maximum allowed. See RTanque::Bot::BrainHelper for some useful constants when setting command values.
There are three main aspects of your tank to control:
Body. The main part of the tank which everything else is attached to. The body can move forward and backward at a variable speed, and also can turn at a variable speed. The two methods
to use are Command#speed= and Command#heading=. Pass a negative speed to move backwards.
There limits to the values you can pass to each of these methods. If you pass a larger value than is allowed, it will be reduced to the maximum allowed.
Radar. The radar can rotate independently of the body. It’s purpose is to detect other tanks. The radar has a limited field of vision so you can only detect other tanks that your radar is generally pointed at.
Use the method Command#radar_heading=, passing an instance of Heading, to rotate the radar.
Turret. The turret/gun can fire shells and can also rotate independently. Rotate the turret with Command#turret_heading= and fire the gun with Command#fire.
Send a large value to #fire to fire a fast shell, and a smaller value to fire a slower shell.
Slower shells do less damage, but can be fired in rapid succession. Fast shells do more damage, but require more time between shots for the turret to recover.
Example. Enough explaining! To get a better idea of how all this comes together to control your tank, make some changes to your code. Provided below are some sample changes, but you’re encouraged to experiment with variations to better understand how to control the tank.
Change the #tick! method of your tank to something similar to the following:
def tick!
  # head right
  command.heading = RTanque::Heading.new(RTanque::Heading::EAST)
  # full speed ahead
  command.speed = MAX_BOT_SPEED
  # while looking behind us
  command.radar_heading = RTanque::Heading.new(RTanque::Heading::WEST)
  # and aiming down
  command.turret_heading = RTanque::Heading.new(RTanque::Heading::SOUTH)
  # and firing some slow & rapid shells
  command.fire(MIN_FIRE_POWER)
end
After making changes, start a new match. Depending on where your bot starts, you’ll see it spin around the move to the right border while firing.
bundle exec bin/rtanque start sample_bots/keyboard.rb bots/game_over.rb
By this point, you can hopefully drive your tank as you would like, but you will be driving blind so to speak. You need help from the tank’s sensors to figure out how to better react.
Input
Have a look at the RTanque::Bot::Sensors.
Each tick, you are provided with a new instance of Sensors via Brain#sensors.
There are many things we can detect about the game state via the Sensors instance. Most are self-explanatory.
Health. If your health falls below 0, your tank blows up and is removed from the game. It could be helpful to monitor this value and modify your strategy if you are low on health.
Gun Energy. If this value is below zero, you cannot fire shells. If you fire fast shells, your gun energy depletes more quickly than slower shells.
Radar. It is useful to detect the position of other tanks. #radar can be treated like an array of Radar::Reflection instances.
A reflection contains the name, distance, and heading of the detected tank.
Depending on the heading of your radar, you will be able to detect some or no tanks.
Example. Like before, we will modify the #tick! method of your tank to try out some sensing methods.
Change the #tick! method of your tank to something to the following:
def tick!
  # head right
  command.heading = RTanque::Heading.new(RTanque::Heading::EAST)
  # full speed ahead
  command.speed = MAX_BOT_SPEED
  # while looking behind us
  command.radar_heading = RTanque::Heading.new(RTanque::Heading::WEST)
  # and aiming down
  command.turret_heading = RTanque::Heading.new(RTanque::Heading::SOUTH)
  # and firing some slow & rapid shells
  command.fire(MIN_FIRE_POWER)

  # every 100 ticks, log sensor info
  at_tick_interval(100) do
    puts "Tick ##{sensors.ticks}!"
    puts " Gun Energy: #{sensors.gun_energy}"
    puts " Health: #{sensors.health}"
    puts " Position: (#{sensors.position.x}, #{sensors.position.y})"
    puts sensors.position.on_wall? ? " On Wall" : " Not on wall"
    puts " Speed: #{sensors.speed}"
    puts " Heading: #{sensors.heading.inspect}"
    puts " Turret Heading: #{sensors.turret_heading.inspect}"
    puts " Radar Heading: #{sensors.radar_heading.inspect}"
    puts " Radar Reflections (#{sensors.radar.count}):"
    sensors.radar.each do |reflection|
      puts "  #{reflection.name} #{reflection.heading.inspect} #{reflection.distance}"
    end
  end
end
After making changes, start a new match. This time, pay attention to the console where you start the match from. Ever 100 ticks, your tank will log
its sensor state. Try moving the Keyboard tank in and out of your tank’s radar view.
bundle exec bin/rtanque start sample_bots/keyboard.rb bots/game_over.rb
Summary
We have seen how to control a tank and also how to analyze the game state. Now it is time to add some logic to help your tank better defend itself and maybe even win a match. Take a look at the SeekAndDestroy tank, which is included in the repository, for an example of a complete working tank.
Distribution
At some point, you may want to share your tank with others, or maybe download a friend’s tank.
The first step to distributing your tank is to upload your tank as a Gist (either public or secret). After creating your gist, it will be assigned an id. With this id, others can download your tank.
Here’s the Marksman tank. You’ll notice it has id 5909793. To download this tank and start a match with it:
$ bundle exec bin/rtanque get_gist 5909793
      create  bots/SteveRidout.5909793/Marksman.rb
$ bundle exec bin/rtanque start sample_bots/keyboard.rb bots/game_over.rb bots/SteveRidout.5909793/Marksman.rb
(Good luck beating Marksman with the Keyboard)
I hope you have found this guide useful. If you find something lacking, or even if you’d like to leave a comment, open a pull-request or find me on Twitter @acw5.
